05 Rostering
The monthly roster
In the grid you plan the month by hand, check the daily demand against the pattern and keep an eye on hours and conflicts.
- For
- Planner
Manage Rosters in the sidebar opens Manage Roster with the grid of the current month.
The toolbar
The toolbar has three groups.
| Group | Buttons |
|---|---|
| Views | Roster – the grid · Swap, Sick, Time – checklists · Leave – leave requests · CAP – resource planning |
| Outputs | IST, SOLL, LEAVE, CSV, XLS, T/A – see Prints and exports · Repeat – multi-day entries, see below |
| Status | Clear AI and AI – autoplan · Publish or Archive – status |
Buttons that are not available in the selected month are greyed out or hidden.
Choosing the month
The tabs show the previous month and the following eight months. Above the grid you see the month, the unit, the Status of the month and – if your organisation has support units – a Support 1/2 ring showing how many of the month's support rosters are already finished. The ring's tooltip lists each support unit with its status.
The grid
Each row is a person with the Staff role who is registered in the unit for the month – in the order set by the administrator. The columns are the days; weekends are grey, public holidays pink, and there is a gap before each Monday.
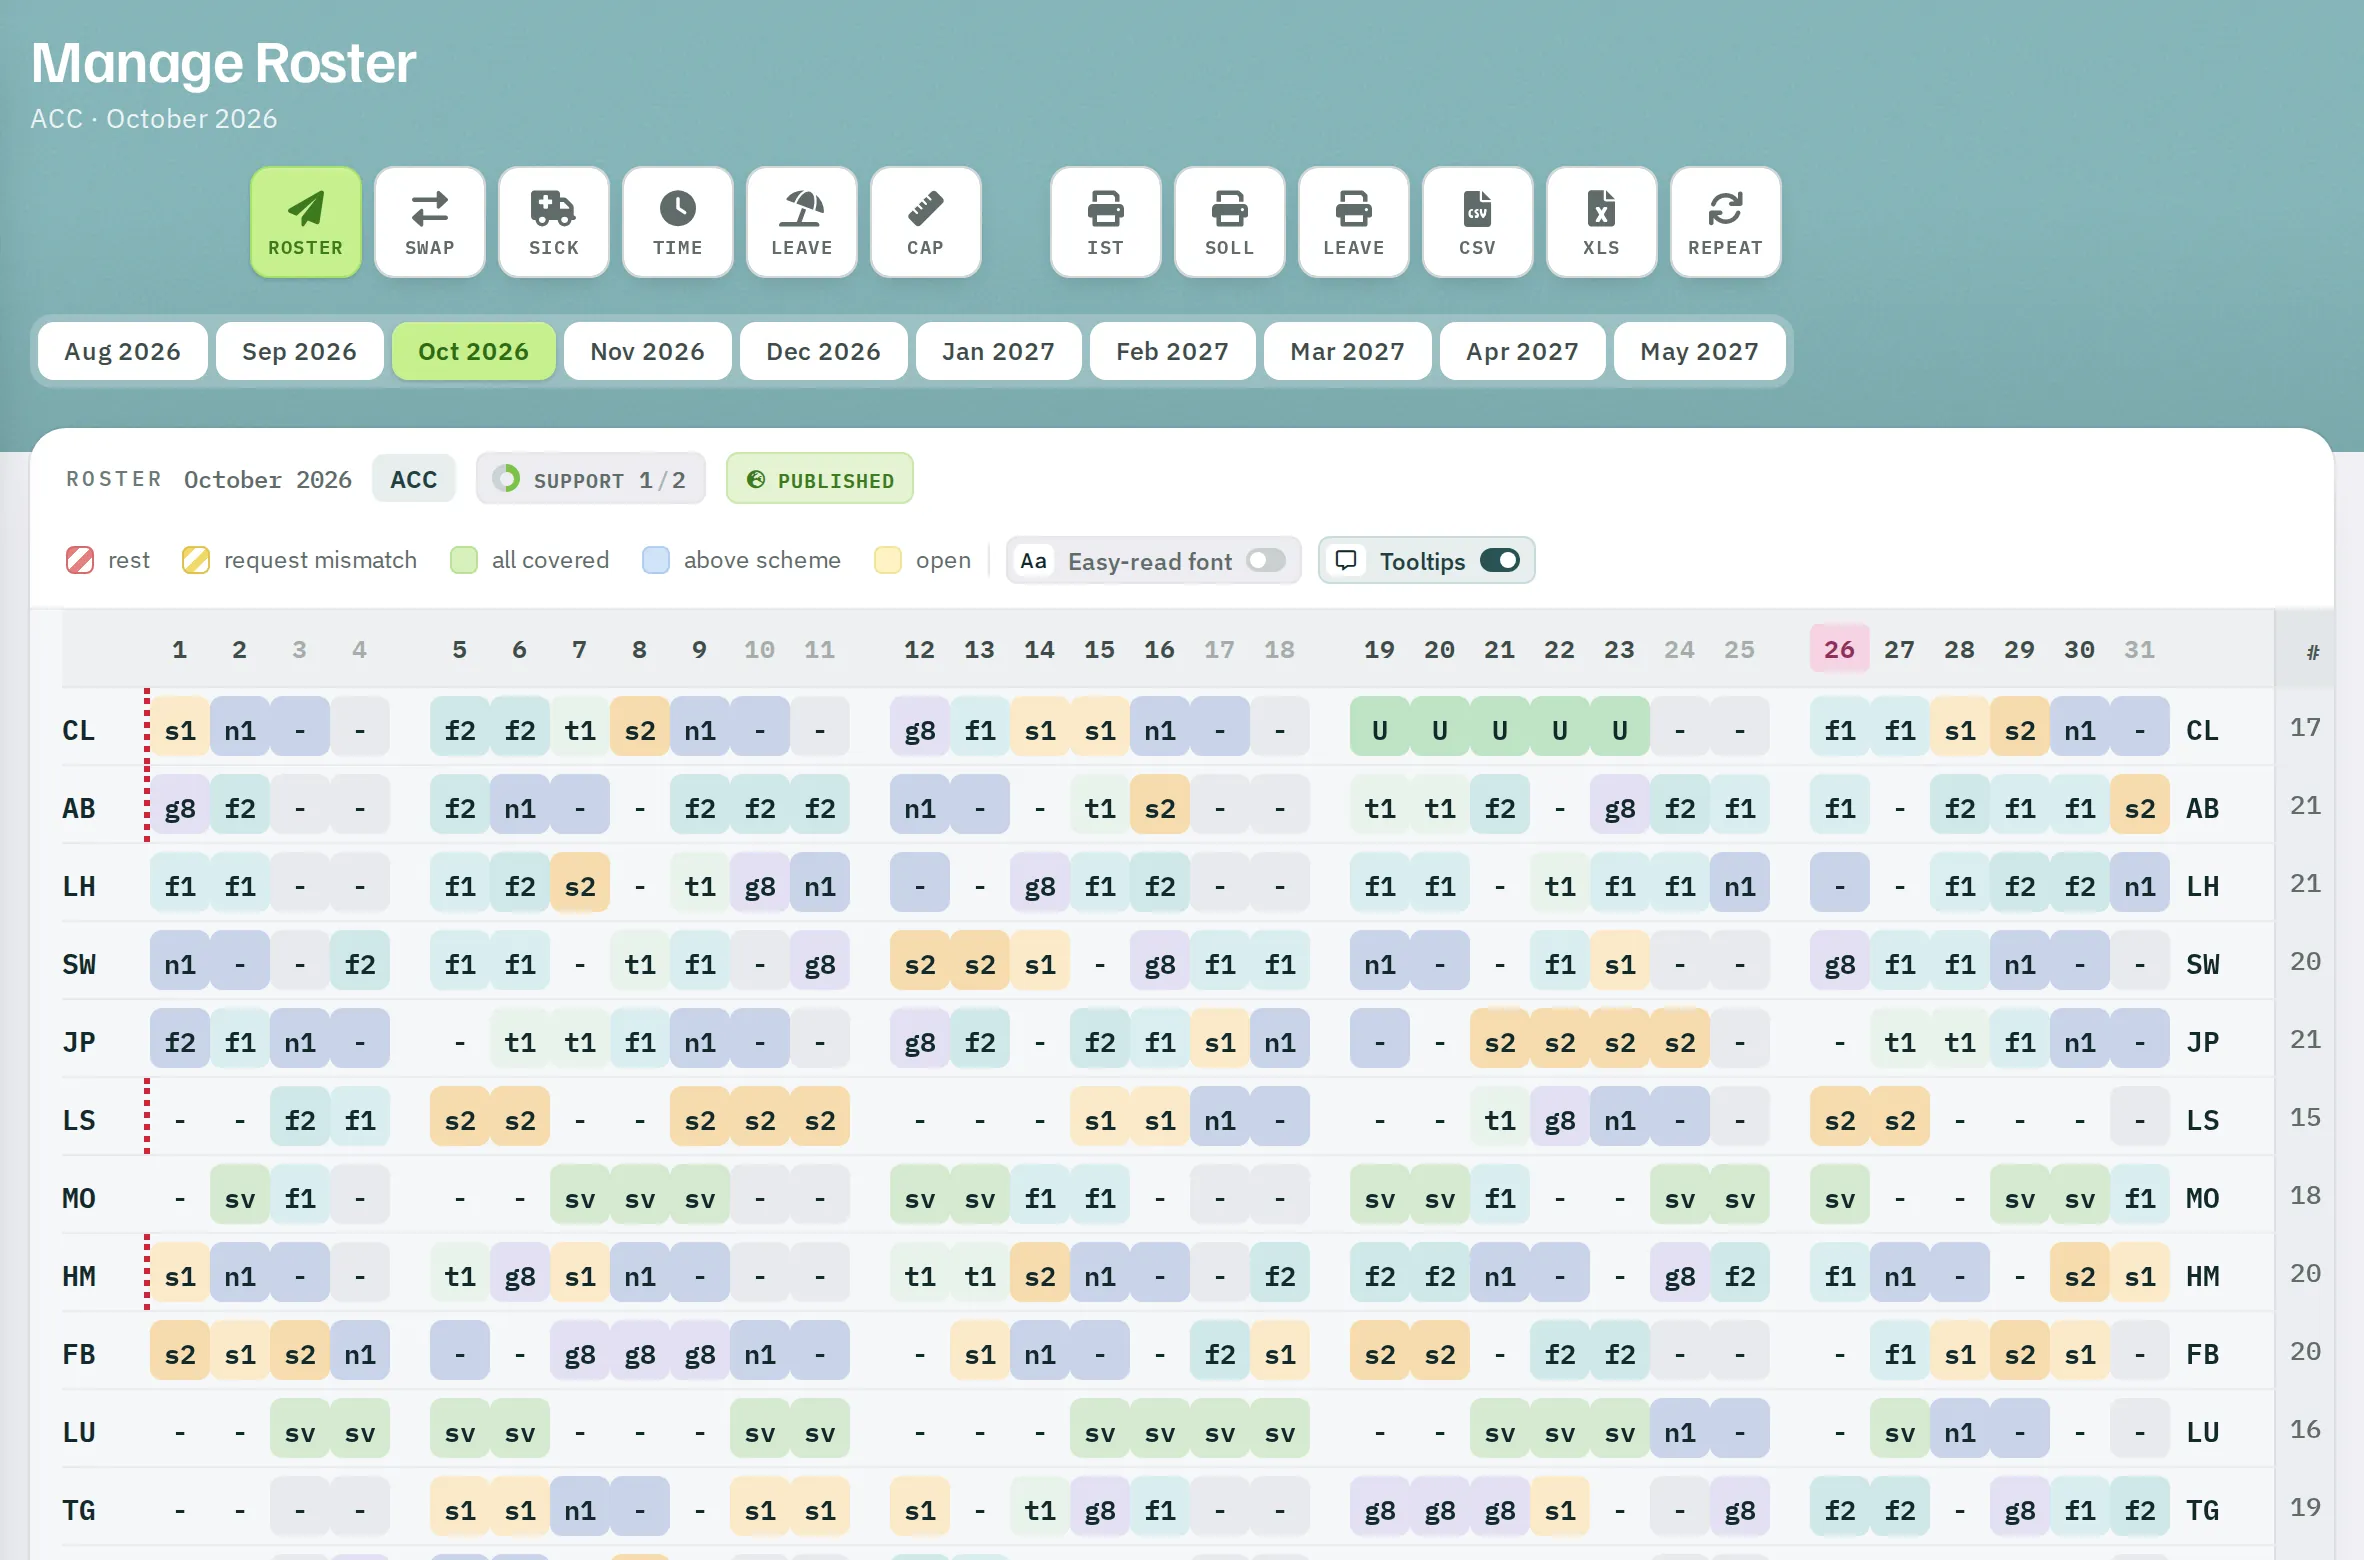
A red dotted edge on the initials shows that the person had three or more shifts in a row at the end of the previous month.
Entering a shift
- Move the pointer over the cell. A green or orange frame shows that you can make an entry.
- Click once. The selection list opens.
- Select the shift. Rostify saves immediately; the cell flashes briefly and the figures and daily demand are updated.
| Frame | Meaning |
|---|---|
| green | Empty or entered by you. |
| orange | Entered by someone else – a staff request, another planner or the autoplan. You can overwrite it; an overwritten request is marked as request mismatch. |
| red | Shift of another unit or a whole-shift overtime. Cannot be changed. |
| none | The month is archived. |
The list contains all active shifts of the unit for which the person holds the required licences. In addition:
| Entry | Effect |
|---|---|
- |
Delete the shift |
MRK |
Mark the shift blue – the autoplan leaves it unchanged |
MK2 |
Mark the shift green – also fixed for the autoplan |
XRK |
Remove the marking |
There is exactly one entry per person and day – across all units.
What the cells show
- Shift code – shifts of other units appear with their alias and a blue-green background.
- Background colour of the shift; absences yellow, sick reports orange. A night shift also colours the following day.
- Greyed-out code with a dashed border in an empty cell – the person's original request after the entry was deleted. Visible until the roster is published.
- Red hatching – rest period or shift sequence violated.
- Yellow hatching – request mismatch.
The tooltip on a person's initials shows their phone number and general requests. The tooltip on a shift shows its times, who entered it and when (AUTO for the autoplan) and, if it differs, the original request.
Figures per person
To the right of the month:
| Column | Meaning |
|---|---|
| # | Number of working shifts in the month, across all units |
| Δ | Balance ACT − TGT in hours. Green between −10 and +15, red above +15 |
| ACT / TGT | Actual and target hours |
| W36 … W40 | Hours per calendar week. Yellow from 50, red from 60 |
| FT3 | Public holiday hours of the past years |
| FT | Public holiday hours of this month |
| Oh | Office hours |
| Action | Copy the row as text · Delete this person's autoplan entries |
All values except FT3 are updated with every entry. They are also explained below the grid in the expandable Legende (legend).
Daily demand
Below the grid, a stack for each day shows the shifts according to the pattern, each with present/needed:
- Yellow – too few: open
- Green – exactly met: all covered
- Blue – too many: above scheme
Shifts that are not in the pattern at all appear in blue with n/0. Only shifts of this unit are counted. Drag the handle between the grid and the demand to adjust the height of the grid.
Display settings
- Easy-read font – a more legible font for the grid and the daily demand.
- Tooltips – switch tooltips on hover on or off.
Your browser remembers both settings.
Repeat – multi-day entries
With Repeat you enter one shift – typically an absence such as a course or parental leave – for one person over a period in a single step.
- Click
Repeat. The form appears above the grid. - Initial, Shift, First Day, Last Day.
- Optionally Ex. WE – exclude weekends. The first day is always entered.
- Click
SAVE. Confirmation: Thank you! Absence saved.
With Repeat, Rostify checks neither licences nor rest periods. The period must be free of other entries for the person, must not start in the past and may cover no more than about 80 days.